Define the scenario
There is already some scenario define in data/scenariotest but you can also define your own
scenario
Scenarios already define
6 scenarios have been defined for you to test your devices:
- test_1: This is the static case, for a minute, data are taken from your simulator and/or your receiver(s).
- test_2: This is the temporal square test, the simulator run a path representing a square at constant speed , each section last a minute. It basically test if the receiver(s) is well responding to a brutal change of direction.
- test_3: This is the temporal circle test, the simulator run a path representing a circle at constant speed, during 2 minutes.
- test_4: This is the test of constant acceleration in straight line.
- test_5: This is the sensitivity test, staying static, the C/N0 is increased. The goal is to see until which C/N0 it is still possible to receive something
- test_6: This is the Free to Urban space test. The goal is to test if the receiver can keep its reliability when passing from a free space to a urban space.
Note
You can remark that all the files stored in the database are saved with an “s” as the first letter of their name. If you want to add your own files, make sure to keep the same notation, and to save it in .txt format.
Create your scenario
You can also create your own scenario, let’s explain that with an example.
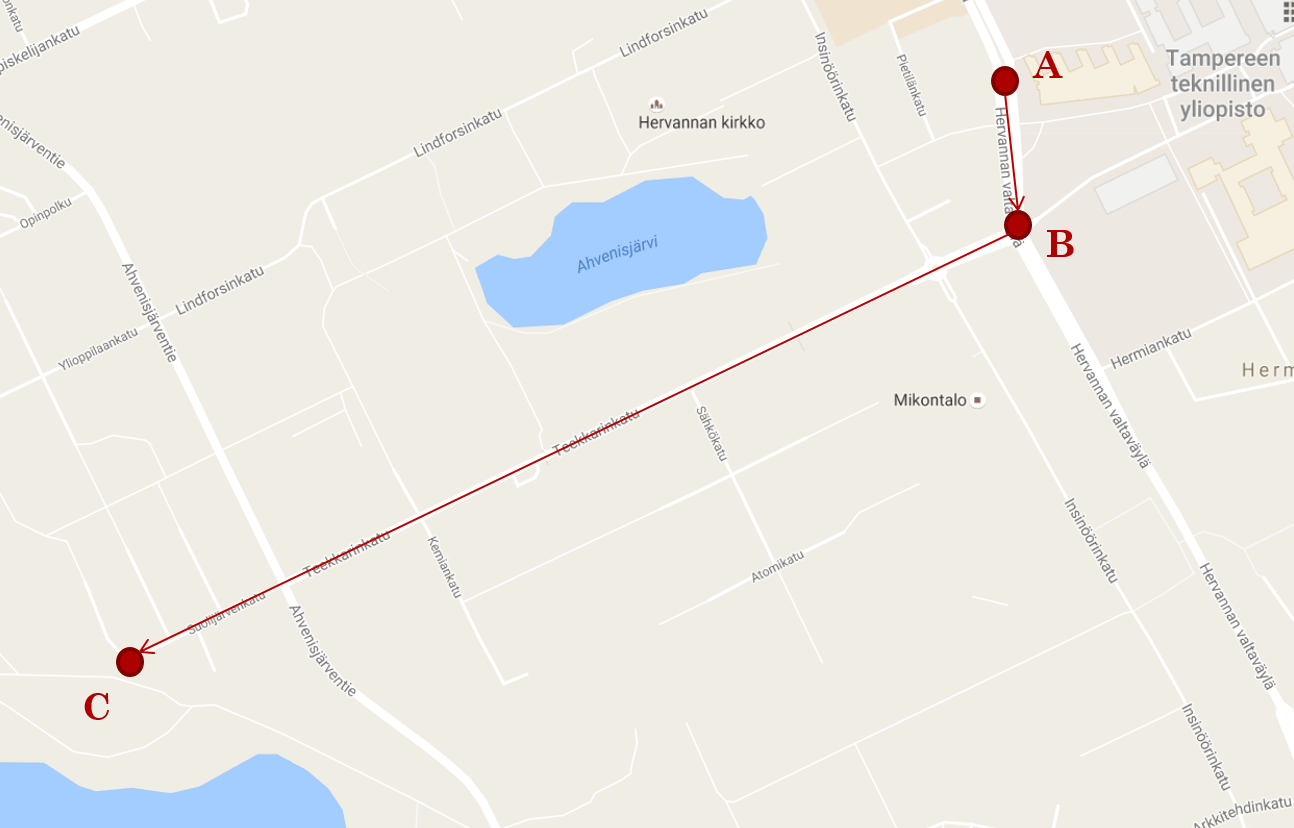
Let’s imagine you want to go from the point A to C passing by B.
- 1st step:
Create a new .ini file and use this template:
[START]
LAT:
LONG:
ALT:
Duration:
Heading:
Speed:
Acceleration:
Rateheading:
Turnrate:
Turnradius:
Cn0:
Propagation:
Antenna:
Tropo:
Iono:
keepalt:
ECEFpos:
Multipath:
SpeedOverGround:
Verticalspeed:
Enuvel:
Ecefvel:
VerticalAcceleration:
ENUAccel:
ECEFAccel:
PRYattitude:
DPRYattitude:
Kepler:
[SECTION 1]
LAT:
LONG:
ALT:
Duration:
Heading:
Speed:
Acceleration:
Rateheading:
Turnrate:
Turnradius:
Cn0:
Propagation:
Antenna:
Tropo:
Iono:
keepalt:
signaltype:
ECEFpos:
Multipath:
SpeedOverGround:
Verticalspeed:
Enuvel:
Ecefvel:
VerticalAcceleration:
ENUAccel:
ECEFAccel:
PRYattitude:
DPRYattitude:
Kepler:
[END]
Note
In the [START] section, just fill the Latitude, Longitude and Altitude information of your departure position.
In our case the [START] section will look like:
[START]
LAT: latitude of A in decimal degrees
LONG: longitude of A in decimal degrees
ALT: altitude of A in meters
Duration:
Heading:
Speed:
Acceleration:
Rateheading:
Turnrate:
Turnradius:
Cn0:
Propagation:
Antenna:
Tropo:
Iono:
keepalt:
ECEFpos:
Multipath:
SpeedOverGround:
Verticalspeed:
Enuvel:
Ecefvel:
VerticalAcceleration:
ENUAccel:
ECEFAccel:
PRYattitude:
DPRYattitude:
Kepler:
- 2nd step:
Copy/Paste the number of [SECTION] needed. In our example, there is two sections:
- Section 1 between A and B
- Section 2 between B and C
For each section, you can now fill all parameters you need but pay attention:
- Either fill a position information or a duration and a heading, not both
- fill LAT, LONG, ALT or ECEFpos not both
- fill ENUvel or ECEFvel or Speed or SpeedOverGround not four of them
- fill ENUaccel or ECEFaccel or Acceleration not three of them
- fill PRYattitude or DPRYattitude not both
For our example:
We know latitude, longitude and altitude of point A and B, and we want to put this 4 parameters (acceleration, antenna model, ionosperic model and tropospheric model).
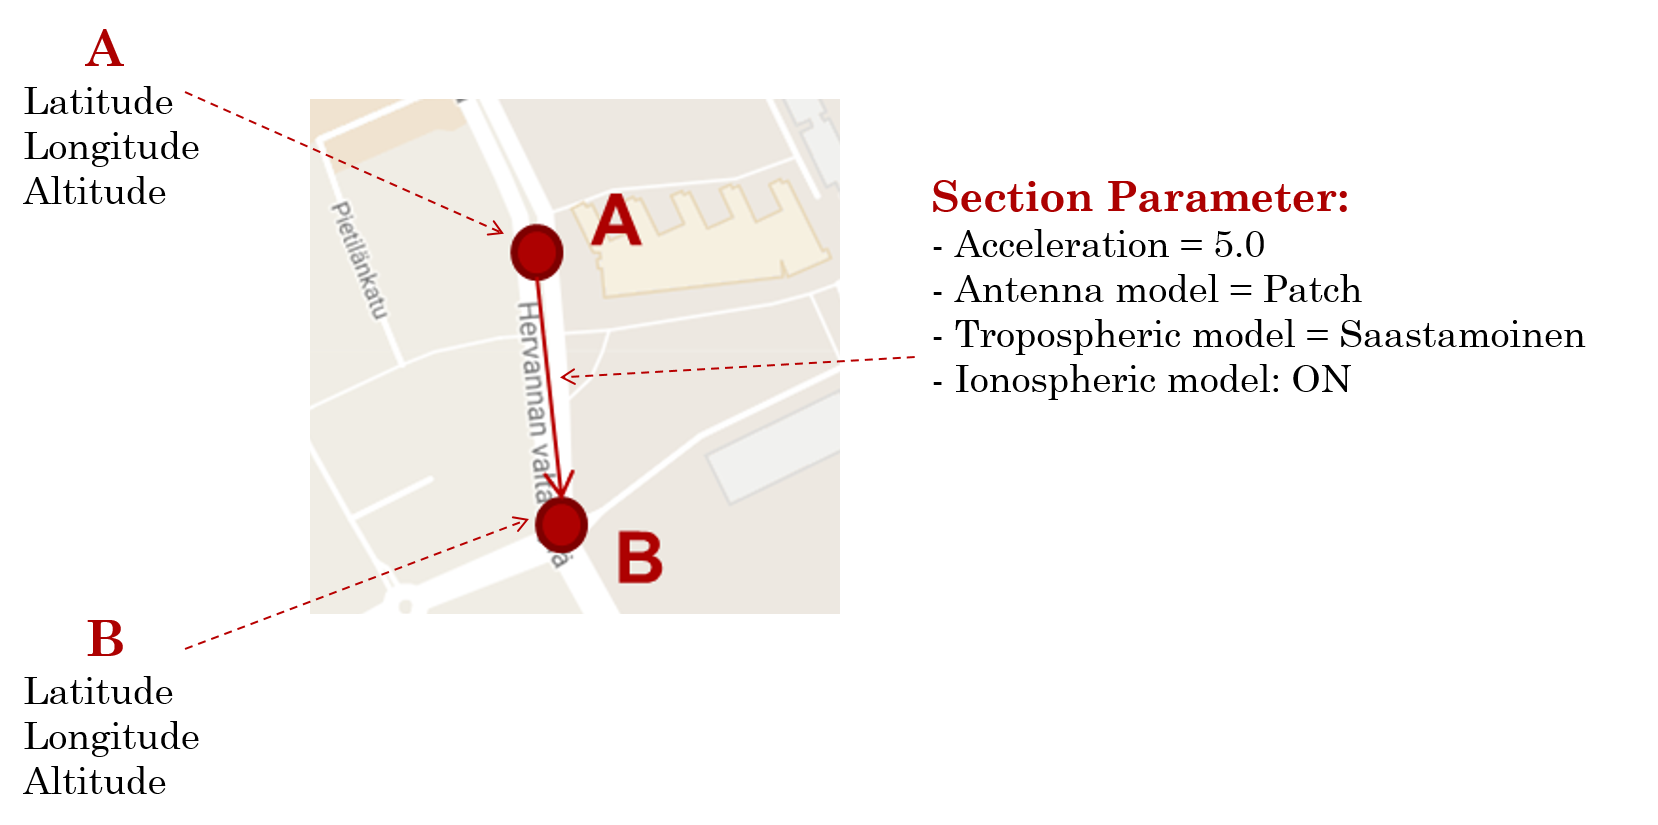
Then our [SECTION1] will look like:
[SECTION1]
LAT: latitude of B in decimal degrees
LONG: longitude of B in decimal degrees
ALT: altitude of B in meters
Duration:
Heading:
Speed:
Acceleration: 5.0
Rateheading:
Turnrate:
Turnradius:
Cn0:
Propagation:
Antenna: Patch
Tropo: Saastamoinen
Iono: ON
keepalt:
ECEFpos:
Multipath:
SpeedOverGround:
Verticalspeed:
Enuvel:
Ecefvel:
VerticalAcceleration:
ENUAccel:
ECEFAccel:
PRYattitude:
DPRYattitude:
Kepler:
Now, to reach C from B, we have to head South West for a minute. During this second section, we want to set 4 other parameters (speed, propagation model, antenna model and tropospheric model).
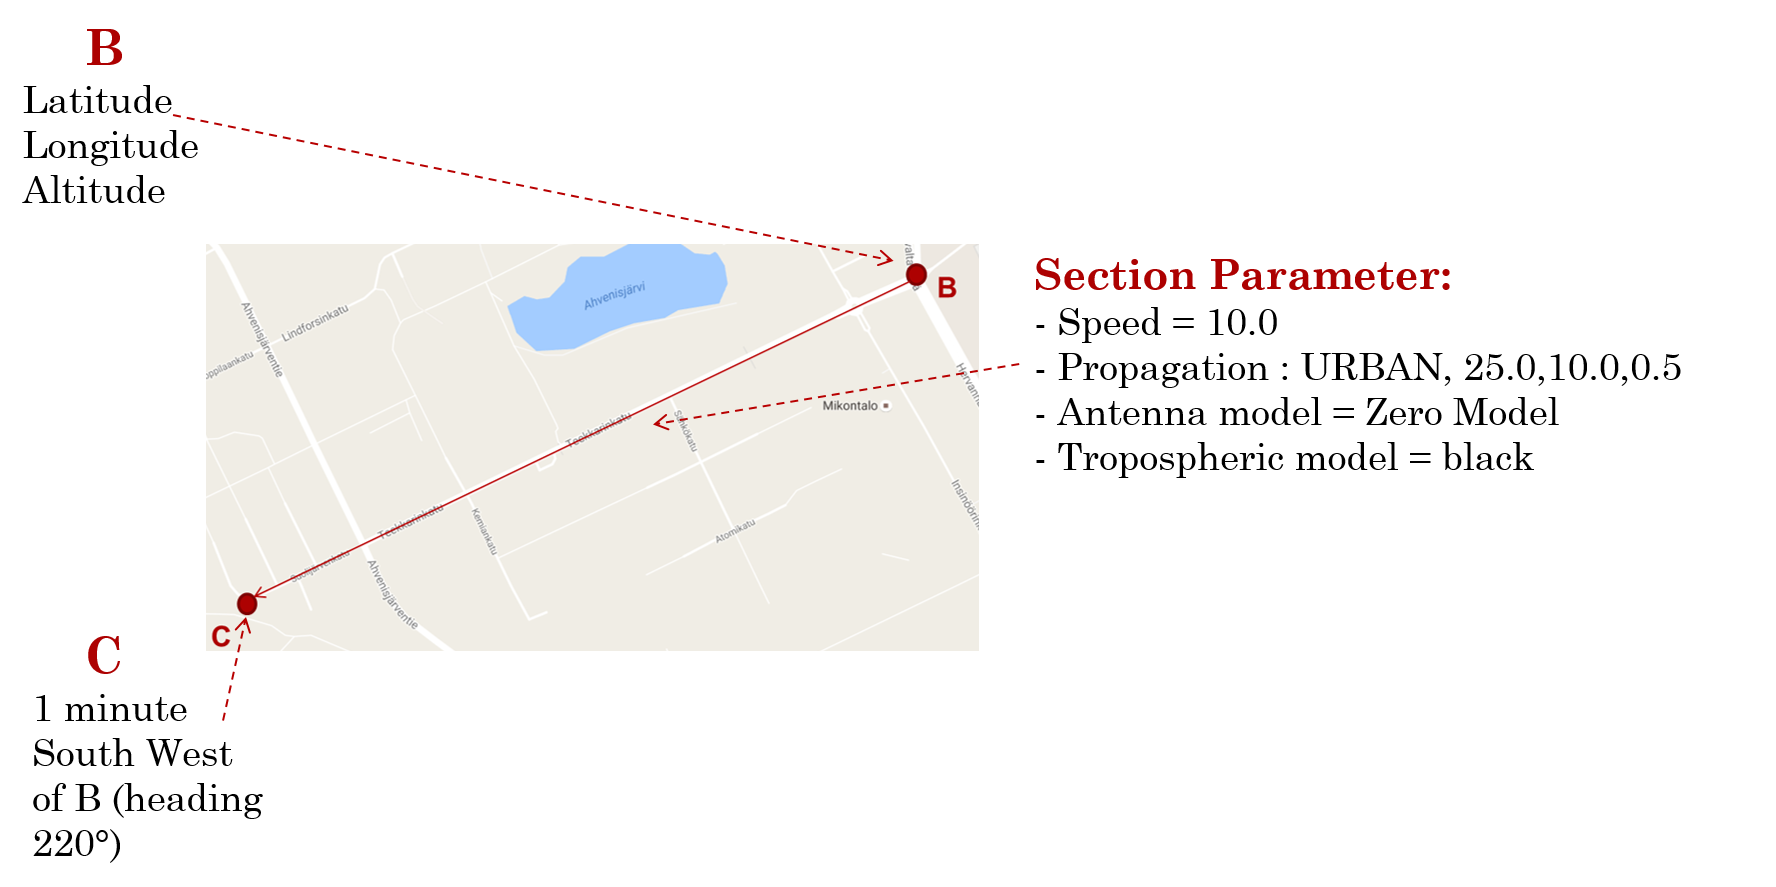
Then our [SECTION2] will look like:
[SECTION2]
LAT:
LONG:
ALT:
Duration: 00:00:01:00
Heading: 220
Speed: 10.0
Acceleration:
Rateheading:
Turnrate:
Turnradius:
Cn0:
Propagation: URBAN,25.0,10.0,0.5
Antenna: Zero model
Tropo: black
Iono:
keepalt:
ECEFpos:
Multipath:
SpeedOverGround:
Verticalspeed:
Enuvel:
Ecefvel:
VerticalAcceleration:
ENUAccel:
ECEFAccel:
PRYattitude:
DPRYattitude:
Kepler:
- 3rd step
Now you just have to put a [END] at the end of the file!